The Octanist WordPress plugin connects your website forms directly to the Octanist platform, enabling automatic offline conversion tracking. It captures form submissions from popular form plugins, and with the help of our field mapping, maps field data according to your settings, and sends it to your Octanist account for comprehensive marketing attribution.Documentation Index
Fetch the complete documentation index at: https://docs.octanist.com/llms.txt
Use this file to discover all available pages before exploring further.
Compatibility
Here is the list of supported form plugins, we are continuously adding more to the list. If you don’t see your form plugin here, please contact us at support@octanist.com.| Wordpress form plugin | Supported without captcha | Supported with captcha | Easy field mapping |
|---|---|---|---|
| Contact form 7 | ✅ | ✅ | ✅ |
| Fluent forms | ✅ | ✅ | ✅ |
| Clio form | ✅ | ✅ | ✅ |
| WP forms | ✅ | ✅ | ❌ |
| Formidable forms | ✅ | ✅ | ❌ |
| Forminator | ✅ | ✅ | ❌ |
| Elementor forms | ✅ | ❌ | ✅ |
| Ninja forms | ❌ | ❌ | ❌ |
| Gravity forms | ❌ | ❌ | ❌ |
For unsupported forms, you can enable tracking by adding the CSS class
octanist-form to your <form> element.Installation
Install the plugin
- In your WordPress dashboard, navigate to Plugins > Add New
- In the search bar, type “Octanist” and press Enter
- Find the Octanist plugin in the search results and click Install Now
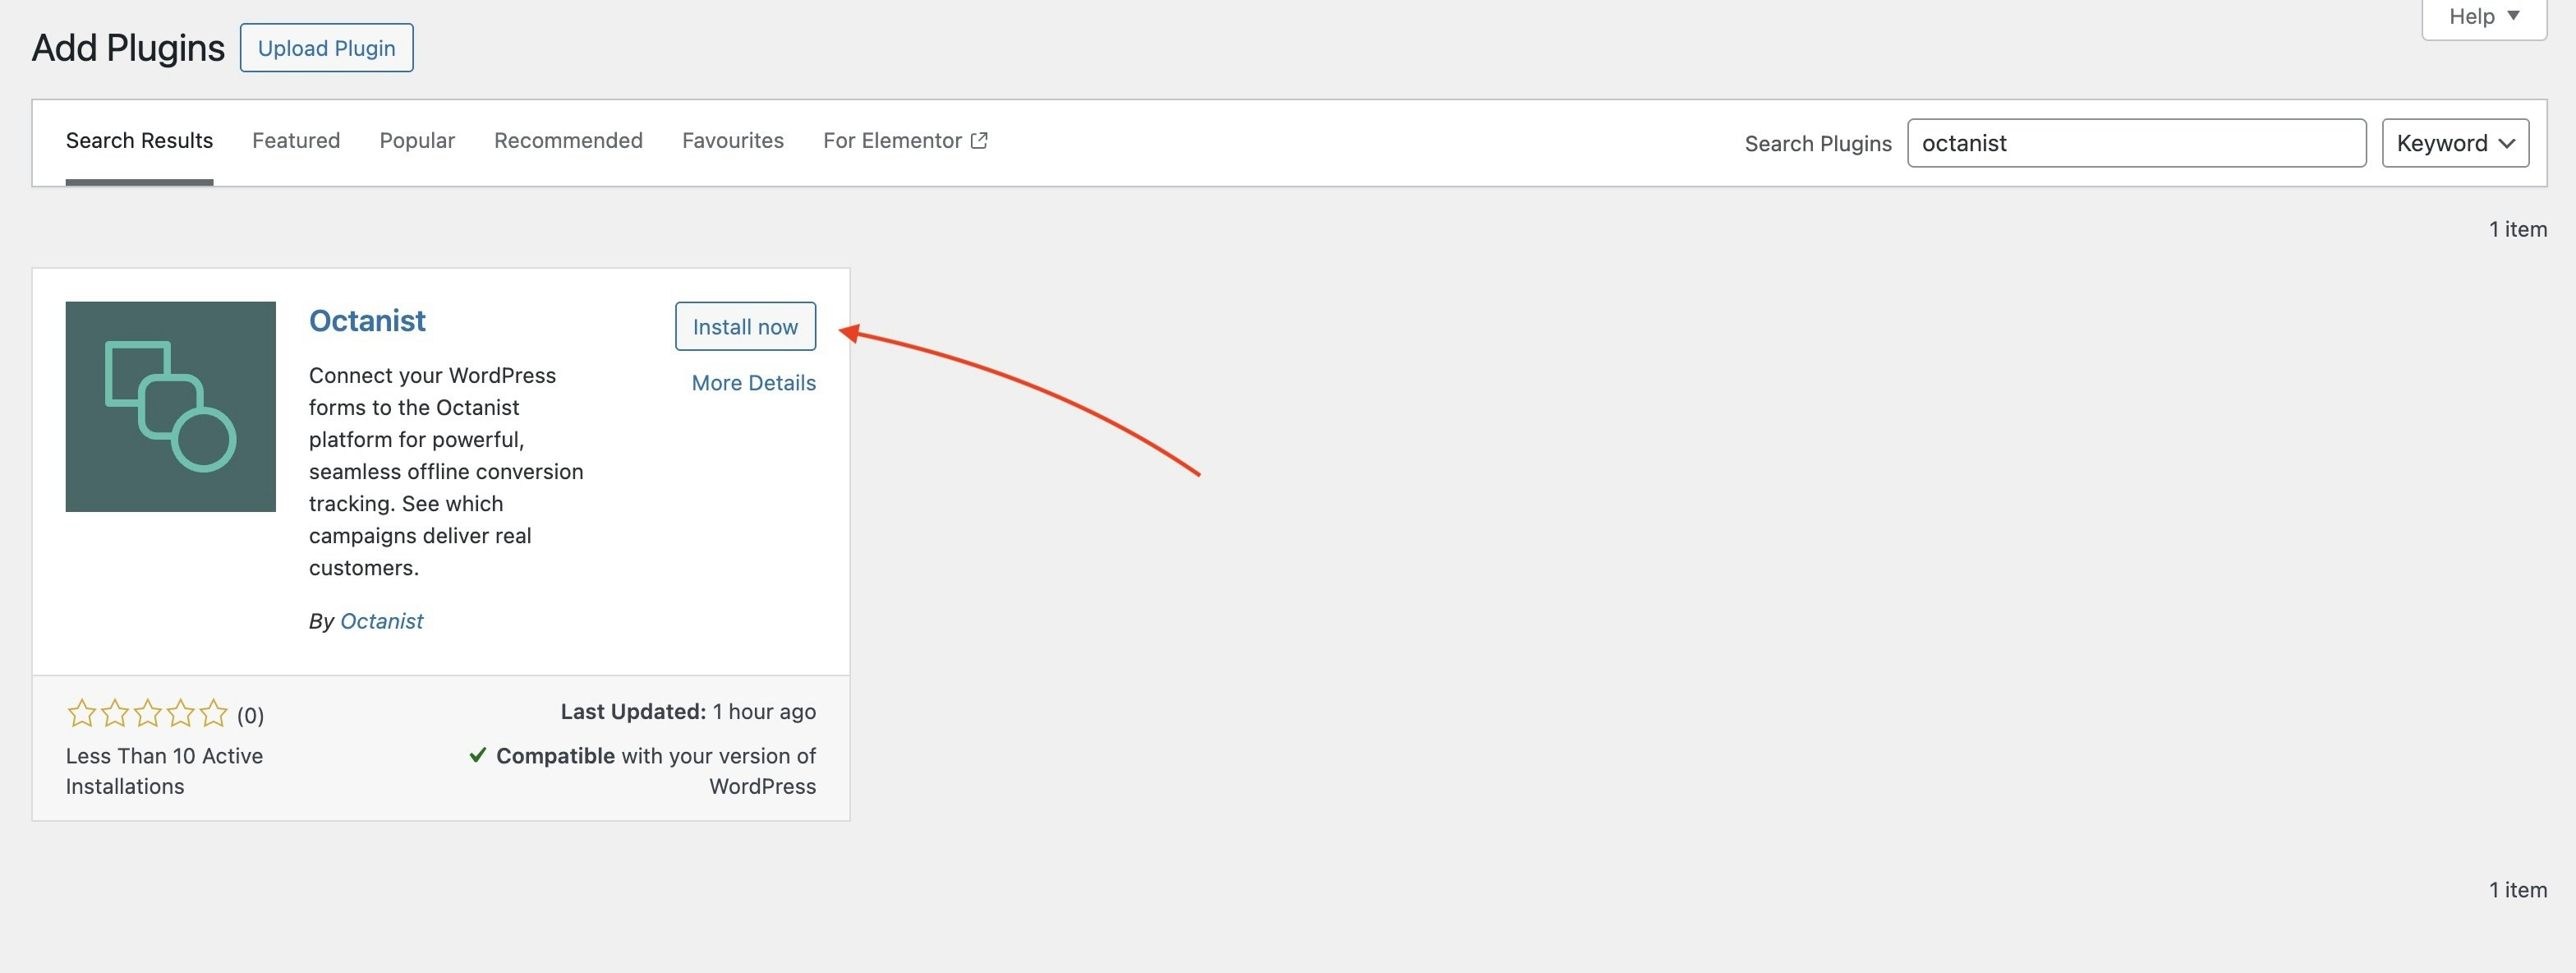
- Once installation is complete, click Activate
Get Octanist ID
- In your Octanist account dashboard, navigate to Integrations > Incoming
- Under Incoming, select WordPress
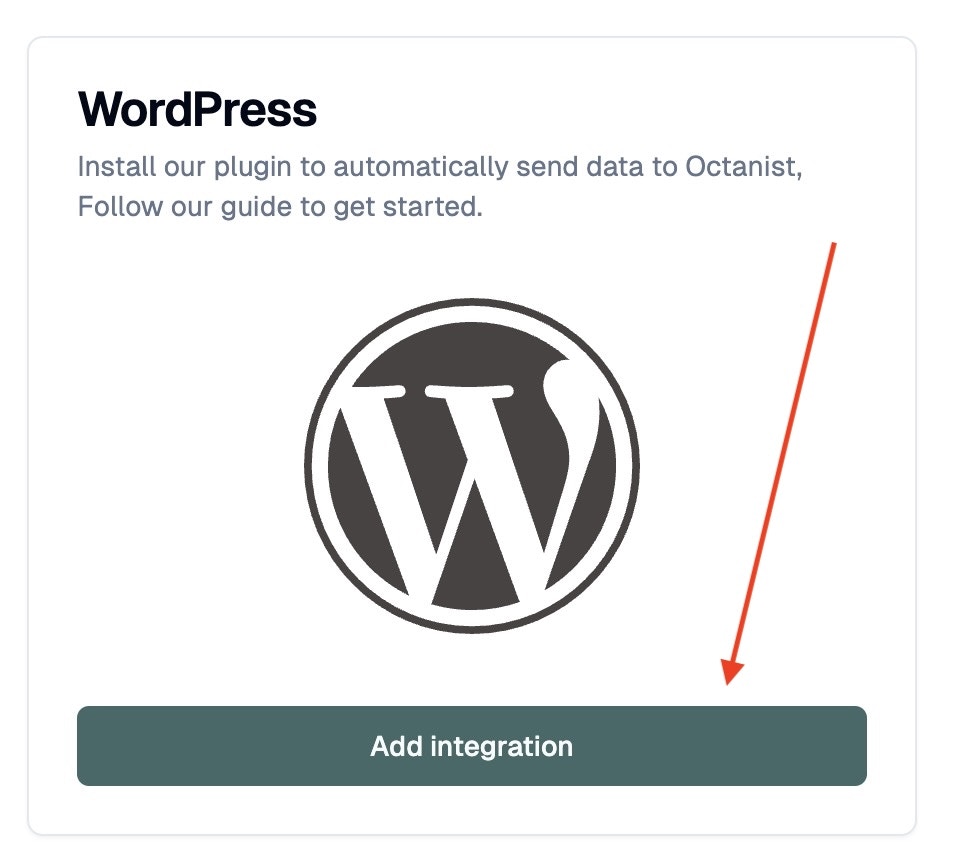
- Copy the Octanist ID

Initial Configuration
- Once activated, go to Settings > Octanist in your WordPress dashboard
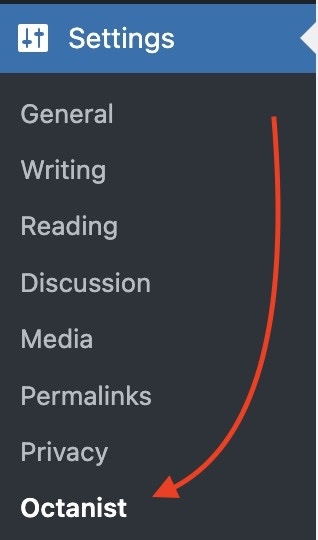
- Enter your Octanist ID (that you copied in the previous step)
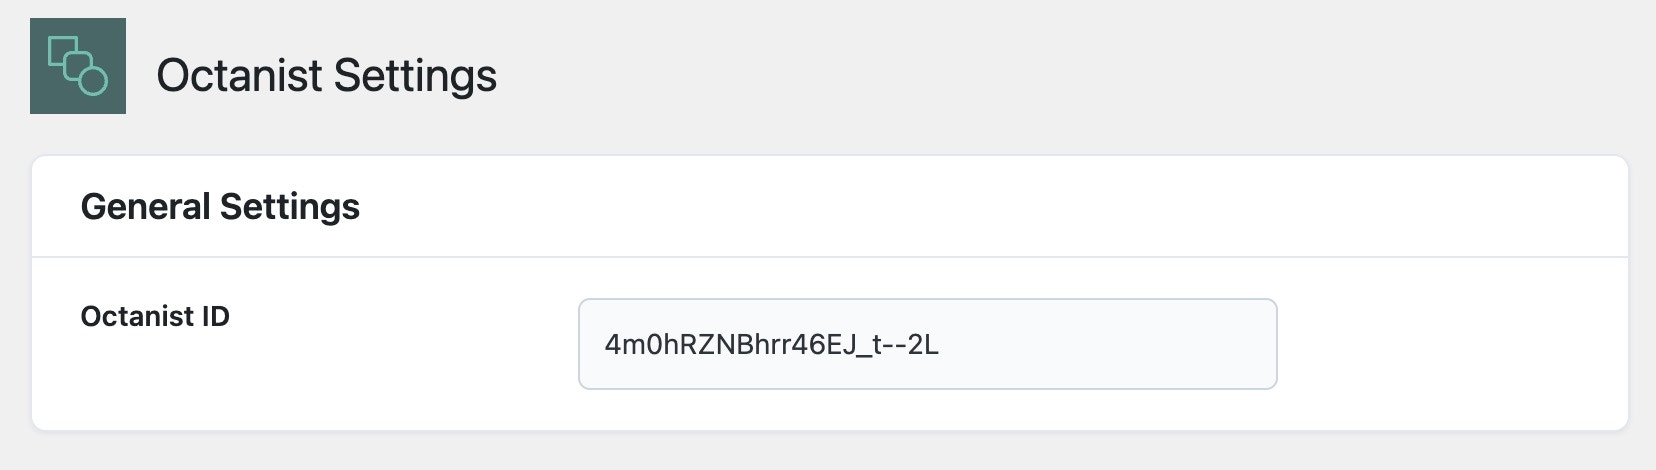
- Click Save Changes

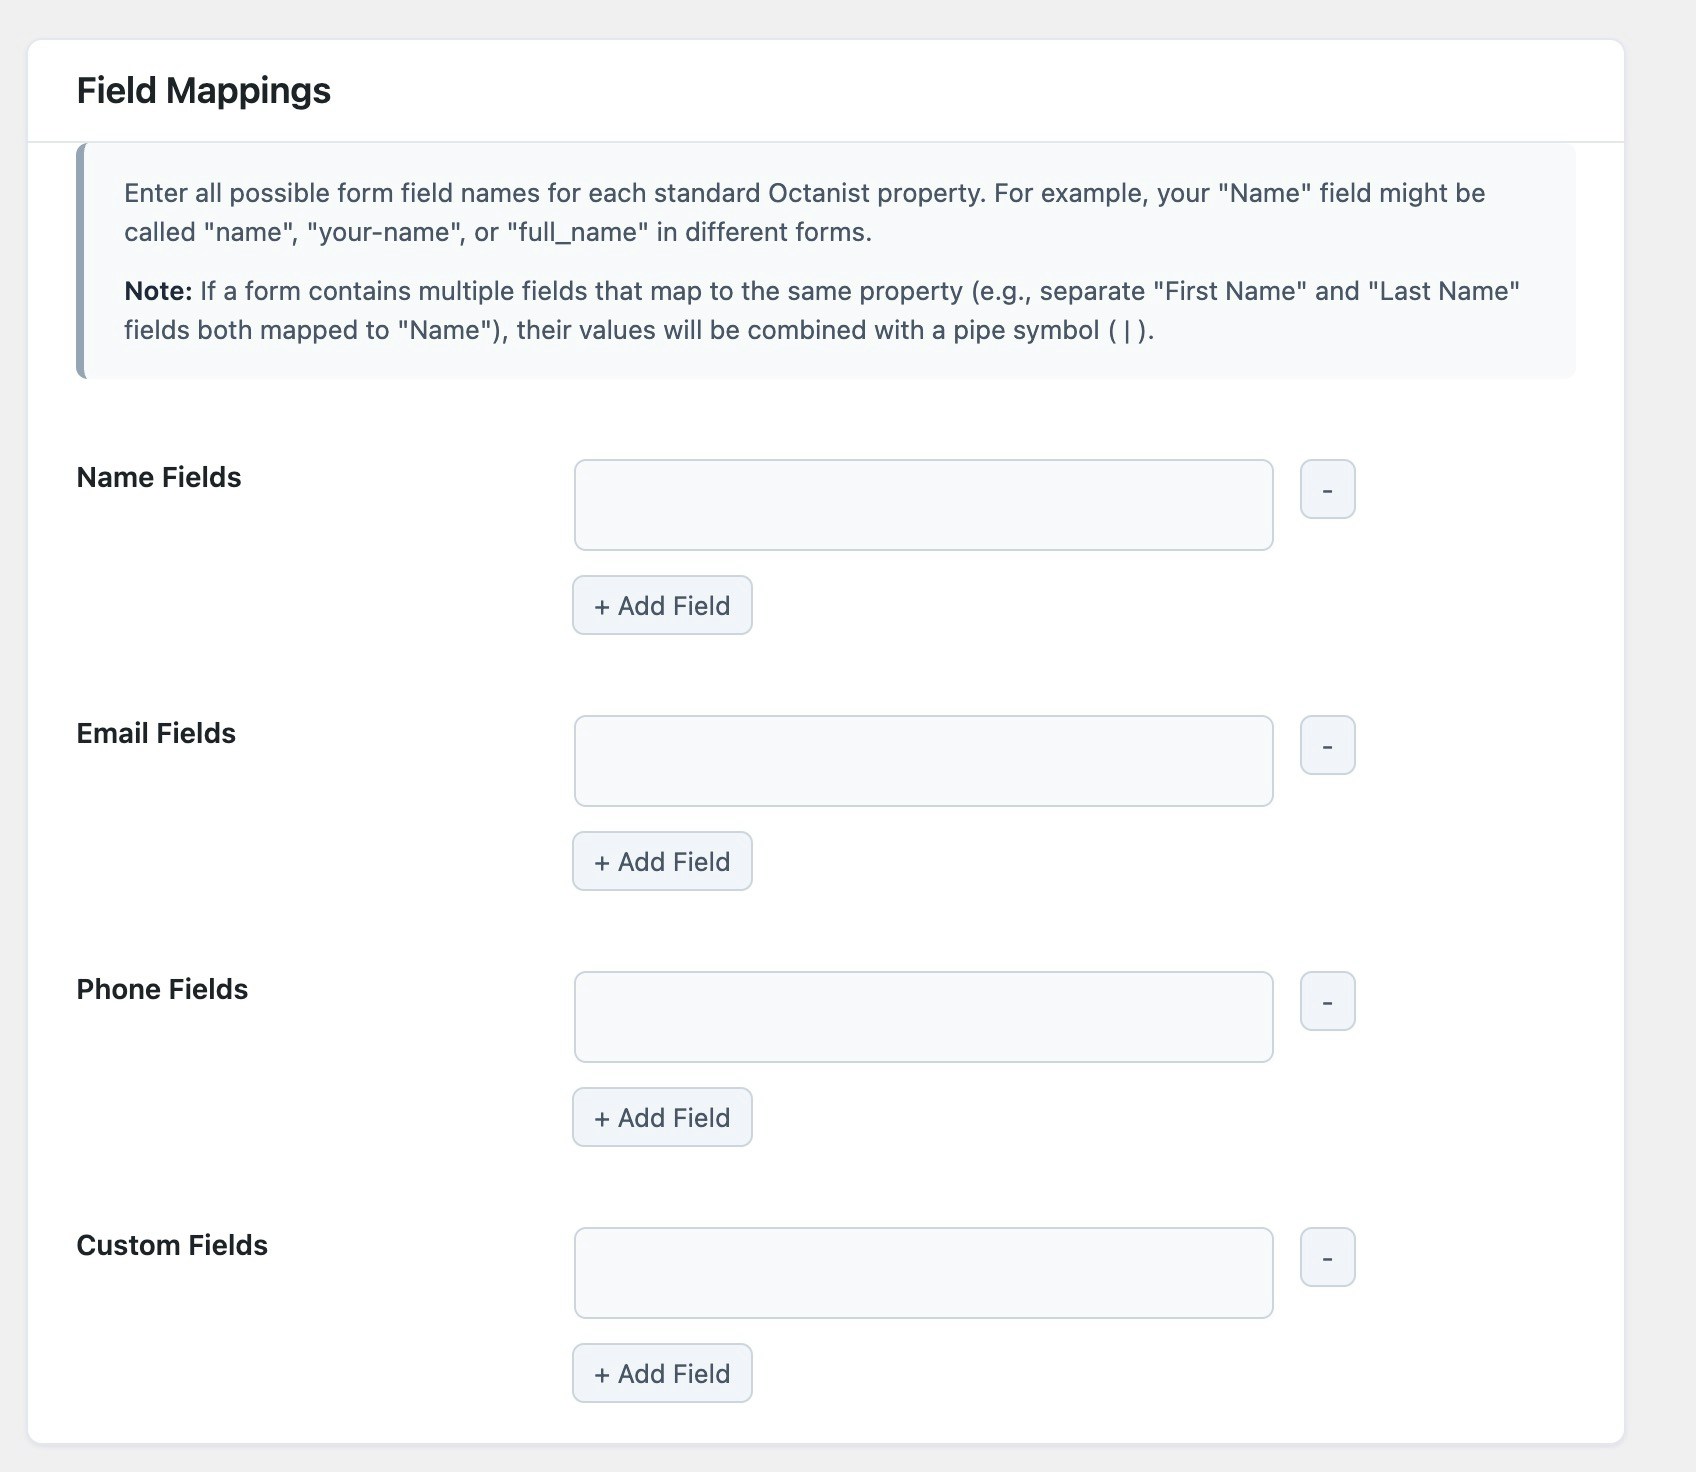
Field Mappings
Understanding Field Mapping
Different form plugins use different technical names for their fields. For example, a “Full Name” field might be namedyour-name, full_name, or text-123 in the code. Field mapping tells the Octanist plugin which of your form’s field names correspond to standard data fields in Octanist.
Configuration Steps
In the Field Mappings section of the plugin settings:- Name Field: Enter the exact
nameattribute of fields containing user names - Email Field: Enter the field name for email addresses
- Phone Field: Enter the field name for phone numbers
- Custom Field: Map any additional fields you want to capture
Finding Field Names
The most reliable way to find field names is using your browser’s developer tools:- Open the page with your form in a new browser tab
- Right-click directly on the form field you want to map
- Select Inspect from the context menu
- Look for the
nameattribute in the highlighted HTML code, the code code look something like this:
- Copy the value inside the quotes (e.g.,
name="your-name"→ useyour-name)
your-name in your field mapping.
Handling Multiple Fields
Combining First and Last Name:- Form has fields:
first-nameandlast-name - In Name Fields mapping: Add both
first-nameandlast-name - Plugin automatically combines them when forms are submitted
- Contact form uses:
contact-name - Quote form uses:
quote-name - In Name Fields mapping: Add both field names
- Plugin treats both as “Name” data
Advanced Settings
Data Transmission Options
- Send data to Octanist: Master switch to enable/disable data sending to Octanist API
- Send data to (GTM) Datalayer: Push form data to Google Tag Manager’s dataLayer
Debug Mode
Enable Debug Mode to print diagnostic information to your browser’s developer console. This helps troubleshoot tracking issues but should only be enabled when necessary.Testing & Validation
- Fill out and submit a test form on your website
- Check your Octanist dashboard for the new lead data
- If using Debug Mode, check browser console for “Octanist Debug” messages
- Verify field mappings are working correctly
Troubleshooting
Forms Not Being Tracked
Check Plugin Status
Check Plugin Status
- Verify the Octanist ID is entered correctly
- Ensure “Send data to Octanist” is enabled
- Confirm the plugin is activated
Verify Form Plugin Support
Verify Form Plugin Support
- Check if your form plugin is in the compatibility table
- For unsupported forms, add
octanist-formCSS class to the<form>element - Enable Debug Mode to see console messages
Field Mapping Issues
Field Mapping Issues
- Field names must match exactly (case-sensitive)
- Use browser inspection to verify field names
- Check for typos in field mapping configuration
Data Appears Incorrect
- Combined fields: Multiple fields mapped to the same type are separated by a pipe (
|) symbol - Missing data: Verify all required fields are properly mapped
- Wrong values: Double-check field name mapping using browser inspection
Next Steps
Your WordPress integration is now active! To complete your conversion tracking setup:- Test thoroughly: Submit several test forms to verify data collection
- Set up outgoing integrations: Connect Octanist to your advertising platforms
- Monitor data flow: Check your Octanist dashboard regularly for incoming leads